
Arming and disarming the blink cameras are the two crucial features of blink security system. The purpose of these features is to make your blink camera more secure by adding an additional layer of settings.
However, if you’ve got this camera recently and using it for the first time, you might get confused with “armed” and “disarmed” modes.
Quick Difference Between Armed Mode & Disarmed Mode: Long story short, the armed mode in the blink camera will activate motion detection, recordings, and notification security alerts. This mode will make your home more secure by continuously detecting motions near the camera. On the other hand, disarmed mode will simply turn off the motion detection, recordings, and alert notifications.
But, worry not! In this post, I am going to discuss all the key differences between blink armed and disarmed mode. Further we will discuss the benefits of each mode and when they should be used. In last, we will also learn how to enable each mode with the help of blink app.
Keep on reading to know more…
Blink Armed Vs Disarmed: Meanings & Differences
As mentioned in the beginning of this post, blink armed and disarmed features refers to turning vital security features ON or OFF.
For your reference, I’ve created this comparison table that may help you understand the key difference between these modes.
| Features(Mode) | Armed Mode | Disarmed Mode |
|---|---|---|
| Motion Detection | Active | Inactive |
| Alert Notification | Active | Inactive |
| Video Recording | Active | Inactive |
| Live View | Active | Active |
| Battery drainage | Fast | Slow |
What happens when blink camera is armed?
Enabling armed mode in blink camera means, that, the motion detection, live view, and alert notification will be activated. This will basically help you to monitor your home more efficiently.
In simple terms, arming blink camera will actively monitor the motion. Once a motion is being detected near the camera, it will automatically record a 5 second video clip and would sent to you on your blink mobile app. Further, you’ll also be notified through mobile app.
Another important thing that you must know is, apart from sending you motion clips on mobile app, the device will also save it on cloud storage for 60 days. The cloud storage is absolutely free for blink XT and XT2 camera users, however, for blink indoor, outdoor, and mini camera, you need a subscription plan to store the clips.
Here’s the list of features that will be activated after arming blink camera:
- Motion Detection: Active
- Alert Notification: Active
- Video Recording: Active
- Live: Active
What happens when blink camera is disarmed?
On the other hand, disarmed mode on blink camera will simply deactivate motion detection, video recordings, and alert notification. This is a case when you won’t get any alert notification in your mobile app nor any video will be recorded.
However, you’ll still be able to access the live view, whether it’s armed or disarmed.
Here’s the list of features that won’t be activated after disarming the blink camera:
- Motion Detection: Inactive
- Alert Notification: Inactive
- Video Recording: Inactive
- Live: Active
How to arm and disarm the blink camera?
When you first install the blink camera, “Disarmed” is the default mode. However, you can enable the armed mode in a couple of ways. For example, you can enable armed mode manually by navigating through the setting in blink app, you can also armed blink camera with scheduled mode, and the last way is to use voice command device, such as alexa or echo dot.
Important To Note: Arming and disarming the blink camera will work for whole system and not just for one individual camera. To arm or disarm individual camera, you need individual sync module that connects with that specific camera.
The step-by-step methods has been discussed below:
Method 1: Arming blink camera manually
The first method we are going to discuss is the manual process. In this method, you need to manually arm or disarmed the blink device whenever needed.
The process is way too simple, follow the steps below:
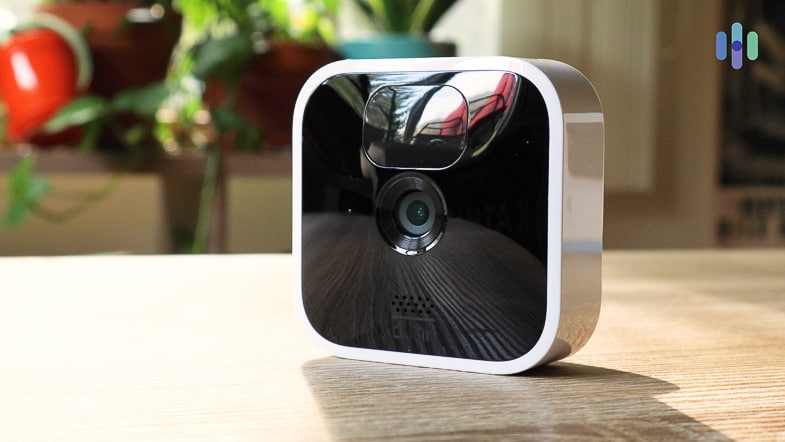
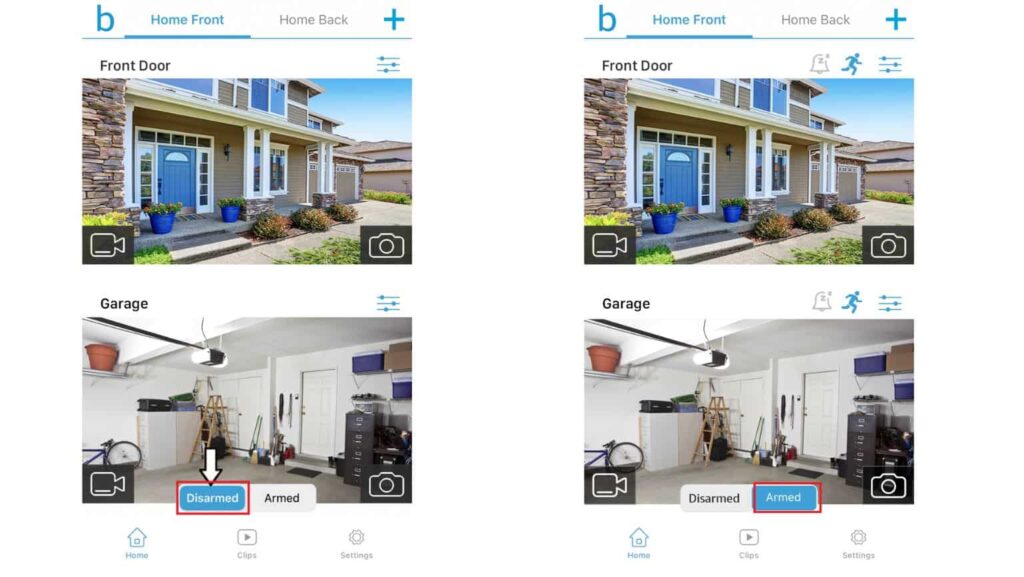
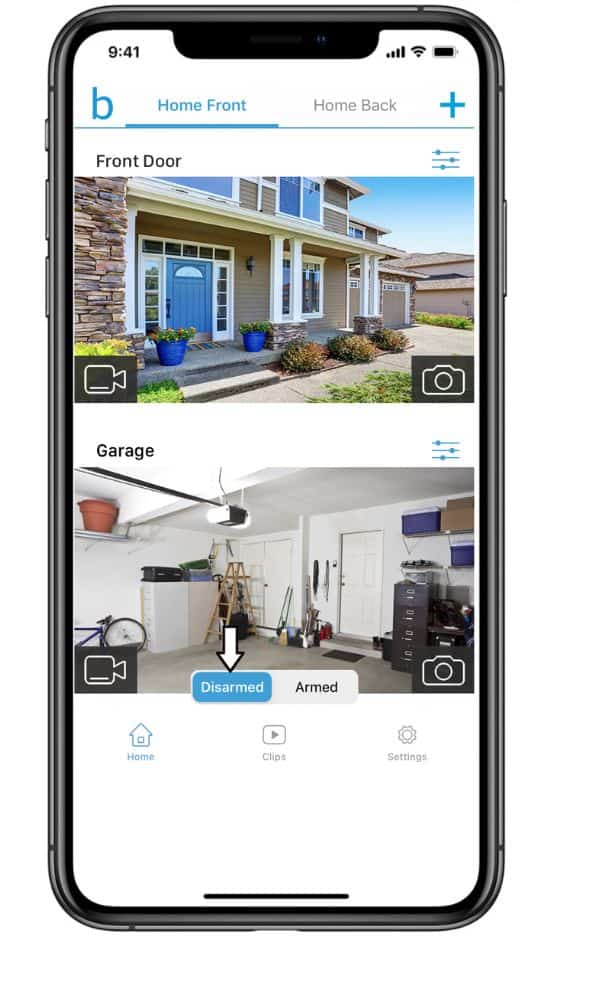
- Step 1: First, open a Blink app on your mobile and make sure you’re logged in to the app.
- Step 2: From the home page, select the device(or associated sync module) you want to arm or disarm.
- Step 3: The, scrool down to the bottom and you’ll see a toggle button for “armed” and “disarmed” mode.
- Step 4: Tapping “armed” will enable the armed mode and tapping “disarmed” will disarmed the the device.
Method 2: Arming blink camera with schedule mode
The first method was about the manual process, however, there is one more alternate way to arm or disarm the blink system. This is a bit automatic way to enable or disable the armed mode, specifically called “schedule mode”.
By using schedule mode, you can set a time duration during which your system can either be “armed” or “disarmed”.
This feature is helpful when you do certain activity at a specific time. For example, kids playing at 5 PM every evening, cleaning the backyard every week on a specific day, etc.
So below are the steps to schedule the “armed” mode on blink camera:
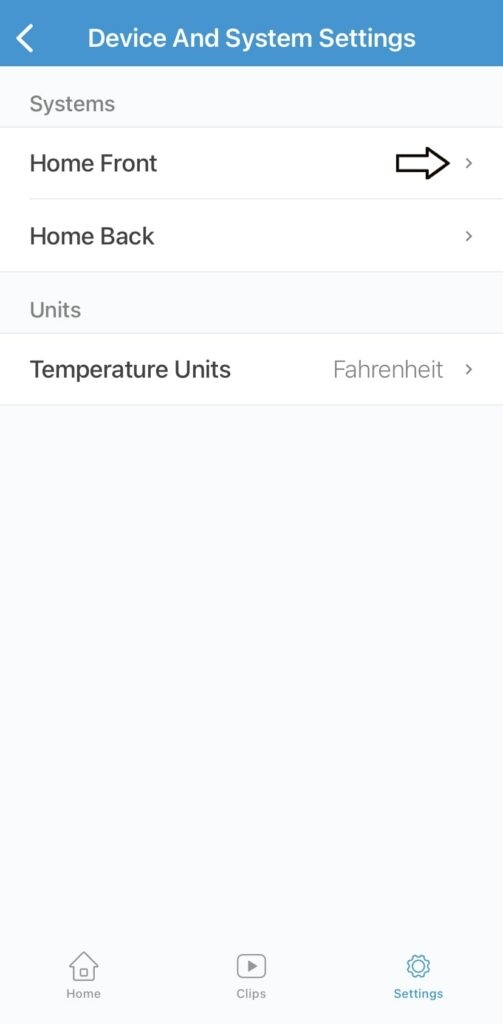
Step 1: First, open the Blink app and log in to your account.
Step 2: Scroll down and click on the setting icon at the bottom.
Step 3: Select your system and go to the setting page.
Step 4: You’ll notice “schedule” option, click on it to customize it.
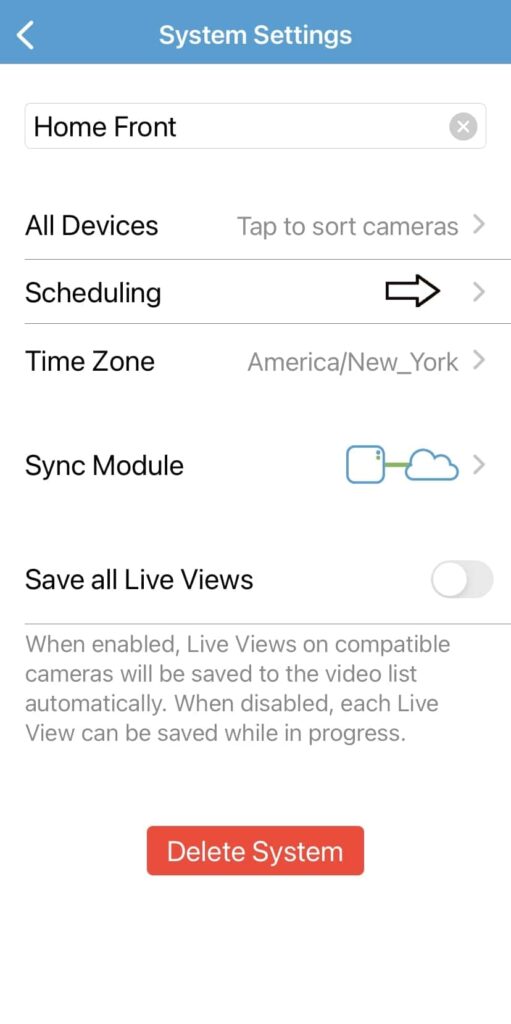
Step 5: Tap the “+” icon and adjust the date, AM, PM, armed or disarmed.


Step 6: Once you set the scheduling, save it and you’re all done.
Method 3: Arming blink camera with Alexa or amazon echo
As you may know, blink cameras can be armed or disarmed using the Alexa voice command. Since Amazon acquired Blink, users can navigate and optimize their Blink system by giving a voice command to alexa and echo dot.
But first, your camera should be linked with Amazon Alexa and must enable the link SmartHome Alexa Skill. Once, the camera is being integrated with the alexa or amazon echo, you may give your voice command.
For example, you can say: “Alexa, please arm blink” or “Alexa, please disarm blink”. Listen the response properly, sometimes alexa misinterpret the commands.
Method 4: Arming and disarming blink camera with IFTT
“If This Than That” has become a popular way to automate your home security system. IFTT, litterally gives you an extra edge to automate the whole blink system.
Just think of a situation, you want blink system to automatically arm whenever you leave your home. Isn’t it so cool? This can be achieved with the help of IFTT, a third party app that works on top applets.
Follow the steps below, to get started with IFTT:
Step 1: Visit official IFTT webpage for blink integration.
Step 2: If you already hold an account, great! If no, create one for further steps.

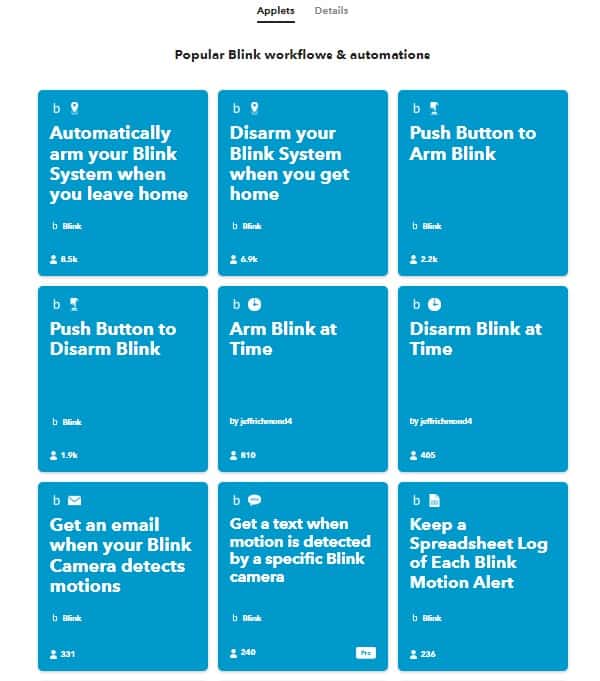
Step 3: Now, once you’re logged in, you’ll see tons of applets that helps you to automate the blink system.These applets have certain commands that works with your blink system. One such applet example is, “Disarm blink system when you get home”. Choose an applet better suits your need.
Step 4: Once you click on an applet, you need to connect your blink account with IFTT.
Step 4: Follow the integration process, and you can turn ON the applet whenever you want so.
Benefits and risks of each mode
Armed and disarmed mode, they both have their own pros and cons when it comes to differentiating between them. However, using each mode with right settings can always be beneficial for you.
Arming blink camera, can activate the motion detection, which sends motion detection alert notification whenever an actvity triggers near the camera. Additionally, it also saves the recording clips on could storage which gives us an additional edge to secure our home.
However, armed mode have some demerits too, which is, it triggers too much motion detection and may send you too many alert notifications. This can be super frustrating when it becomes a day-to-day activity.
On the other hand, disarmed mode won’t send you notification, but, at the same time it makes our home vulnerable to threats.
How to arm individual blink cameras?
You might be curious to know if there is a way to enable armed mode in a specific blink camera.
Unfortunately, there is only one way to arm an individual camera by simultaneously arming the entire system. In simple words, whatever settings you apply, be it “armed” or “disarmed”, it gets automatically applied to the whole blink system.
However, you can turn off a specific camera’s motion detection, alerts, and video recording features even if it is “armed”. Further, to deal with individual camera, you need individual sync module that you need to integrate with that specific camera.
Some common arming and disarming problems
A few times, you may experience some issues with the blink system related to armed and disarmed mode. Though, they are easy to troubleshoot with official blink guide, however, for a new user it can be a bit annoying to fix the problem.
In this section of this post, we are going to fix some common issues that you may encounter while arming or disarming the blink system.
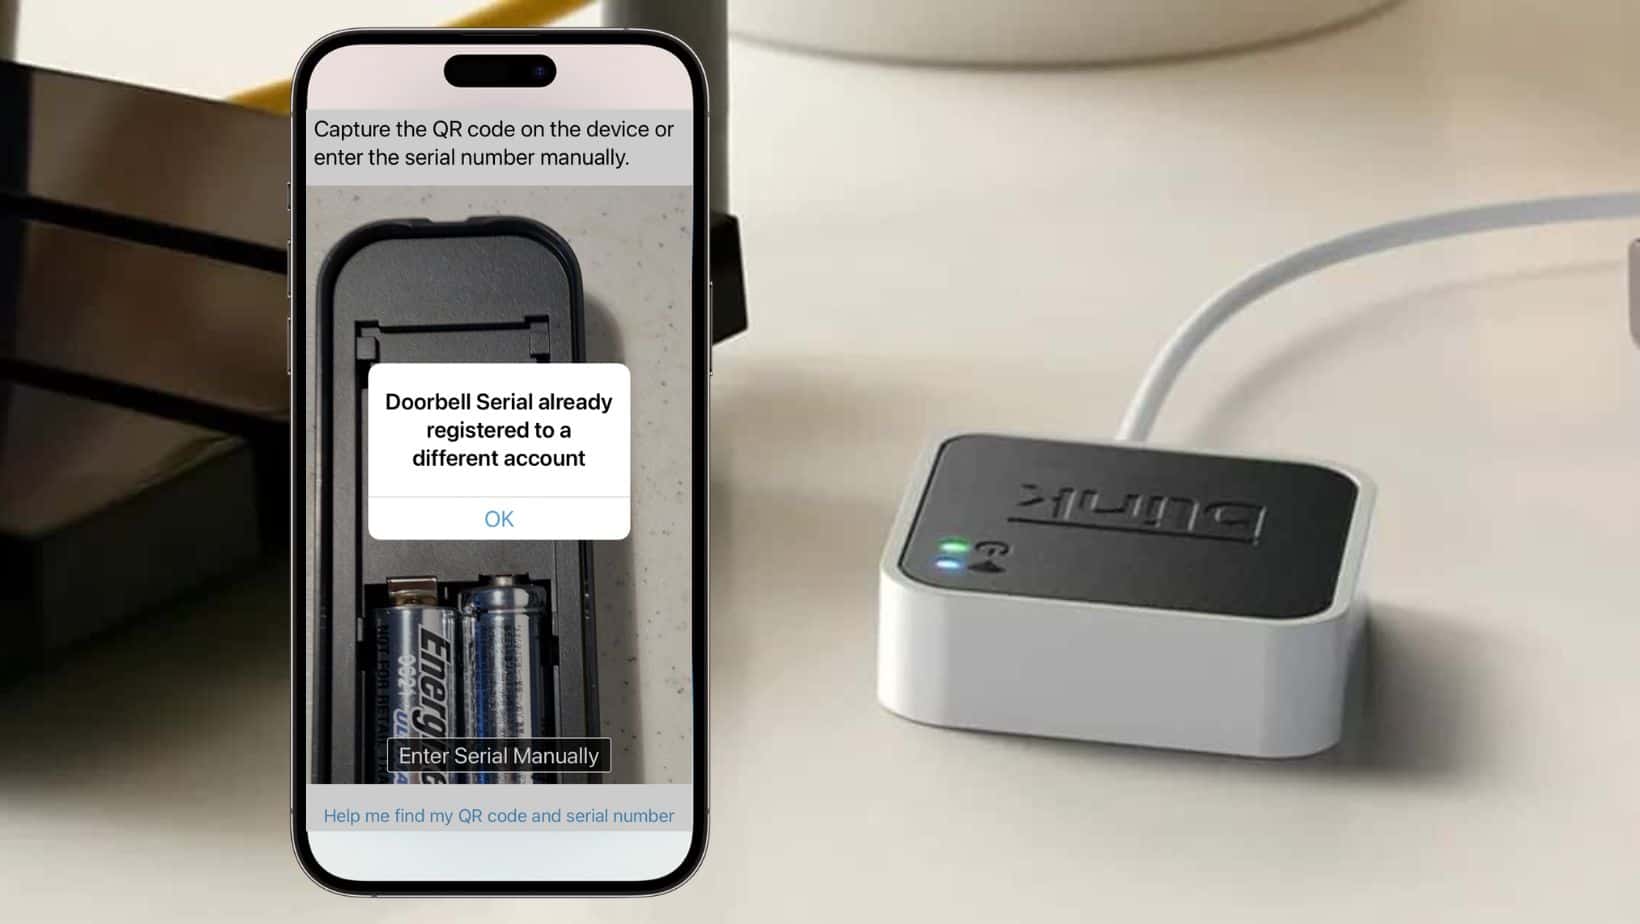
Blink camera failed to arm
Did your blink camera continuously failed to arm? Don’t worry. There may be a network issue, or connecitvity issue between camera and sync module.
Make sure your system is receiving stable internet connection from your wifi router. Further, check if the connection between camera and sync module is strong enough to perform certain function. You may cross-verify it by bringing your camera near to sync module.
Make sure the distance between sync module and camera is under 100 feet.
If nothing works, try to restart the sync module, this should most probably fix the disconnection issue in blink system.
Blink is armed but not recording video
A few times it has been seen that even if the blink is being armed, the camera won’t detection motion or records videos. One of the major reason why this could happen is because you might have disabled motion detection and video recording.
Hence, head over to your blink app and cross-verify if you’ve actually enabled motion detection by navigating through the blink app.
Further, you may restart the sync module to see if that fixes the issue. Additionall, make sure the internet connectivity is strong enough to detection motion and record videos.
Blink camera keeps disarming itself
If you’re not familiar with the blink system too much, you might get into this trouble. If your blink system is automatially disarming itself, verify if “scheduled mode is ON”.
If the scheduled mode is being ON, your blink system may disarm automatically at specific time according to the scheduling you’ve setup.
Make sure you disable the schedule mode to keep your system in armed mode.
Frequently Asked Questions(FAQs)
When the blink camera is armed, it turns ON video recording, motion detection, alert notifications, and other secuirty features. This is not the default mode in blink camera, you need to turn it ON manually.
No, to detect motion on your blink camera you don’t need to arm your blink camera. However, you won’t recive any alert notification on your mobile app.
Your blink camera takes random pictures because the photo-capturing feature is enabled. These security cameras take thumbnail photos every hour or once daily to convert them into video clips. It helps to monitor outside activity by photo clip instead of motion alert.
You can arm the blinking camera automatically by scheduling the time zone. Users can use this function to set date, time, arm, or disarm specific systems.
Conclusion
Finally, in this post we learned blink armed vs disarmed mode. Their key differences and how does motion detection works in armed and disarmed mode.
We tried to answer every possible queries that you might have as a blink user.
Concluding everything, armed or disarmed refers to security features in blink cameras.
Armed Blink ensures that motion detection, alerts, and video recording is ON. On the other hand, disarmed mode means all security features are disabled.
Users simultaneously use these features according to their needs. If you go outside, vacation, or need privacy on your property, keep your blink-armed to be safe. While on the other hand, if you’ve organized a party or the kids are playing, keeping your blink camera disarmed is a better option to stop receiving fake alter notifications.
You may also like to read: