

Removing the hard drive from your MacBook Pro is not a tough task if you know how to remove it correctly.
However, if you are not sure, then one wrong step and you will end up damaging your Macbook Pro for good. Sounds scary, right? So, now you must be wondering “How to remove the Hard Drive from your MacBook Pro?”, without risking data loss, or system malfunctioning.
Things can become worse if the wrong steps are taken to remove the hard drive, for example, you will end up losing your data, only a few bits will be left in your system, and your PC’s speed will deteriorate
If you are trying to remove the hard drive by yourself then there are a few things you should know and prepare before proceeding with the removal of the hard drive.
In this article, we will be discussing reasons why you need to remove the hard drive from your MacBook Pro and the right steps you should take while removing the hard drive and replacing it with the new one.
Why You May Have To Remove Hard Drive From MacBook Pro?

There are multiple reasons why you should remove your hard drive from your MacBook Pro and replace it with the new one. The hard drive is responsible for storing data and if it’s facing some issues then your system might end up crashing.
Here are some reasons that will help you identify if there is a need to remove/replace hard drive:
Clicking Sound
One of the reasons can be a clicking sound coming from the hard drive. You may have noticed a peculiar clicking sound coming from your Macbook, it’s the sound that’s made from the hard drive’s head.
It can be because one of the hard drive’s plates is damaged, or it’s not getting enough power supply.
Your System Keeps Crashing
While working on your MacBook, if your system keeps crashing for no reason, then it’s a sign that your hard drive needs to be changed. If your hard drive keeps crashing, consider replacing it with the new one or else it will stop working.
Access Denied
When you try to access the hard drive in your MacBook, and you keep seeing an access denied prompt popping up, this indicates that your system is having trouble locating it.
This can also happen when the drive is in use by another process, but if the same thing keeps appearing again and again then there’s a problem with your hard drive. You should get it changed with a new one to avoid any further problems.
OS Not Loading
When you are rebooting your system, you may have noticed a recovery message that says “Your PC needs to be repaired. The application or operating system couldn’t be loaded because a required file is missing or contains errors.” This usually happens when the hard drive is damaged or having a malfunction.
Inaccessibility Of Data
A hard drive is where most of your data is stored, if you are having trouble accessing your data, then it’s a clear sign that there’s a problem with your hard drive.
This can happen when your hard drive is corrupted, or it can also be a sign of further issues with your hard drive.
Blinking Folder With Question Mark
Ever noticed a blinking folder with question mark mac whenever you start your system? We can say that it’s a sign your laptop can’t find a startup disk, so it’s unable to boot.
Another reason can be that the MacBook is unable to find the hard drive or the data in the hard drive is corrupted.
How To Remove Hard Drive From MacBook Pro?
Now that we are done with reasons why you should remove the hard drive from your MacBook Pro, let’s start with the process of how you can remove the hard drive from your MacBook Pro.
But here’s something you should know before you start.
Please note, the process could change depending on your MacBook model. There are some old models of Apple, these laptops require a bit of technical skills and lots of patience to remove the hard drive from the system.
Also once you open up your MacBook, no Apple warranty will be applicable on it. So, only proceed when you are confident enough to remove the hard drive from your MacBook Pro.
Here are the steps that will guide you on how you can remove the hard drive from your MacBook Pro:
Step 1: Get The Tools
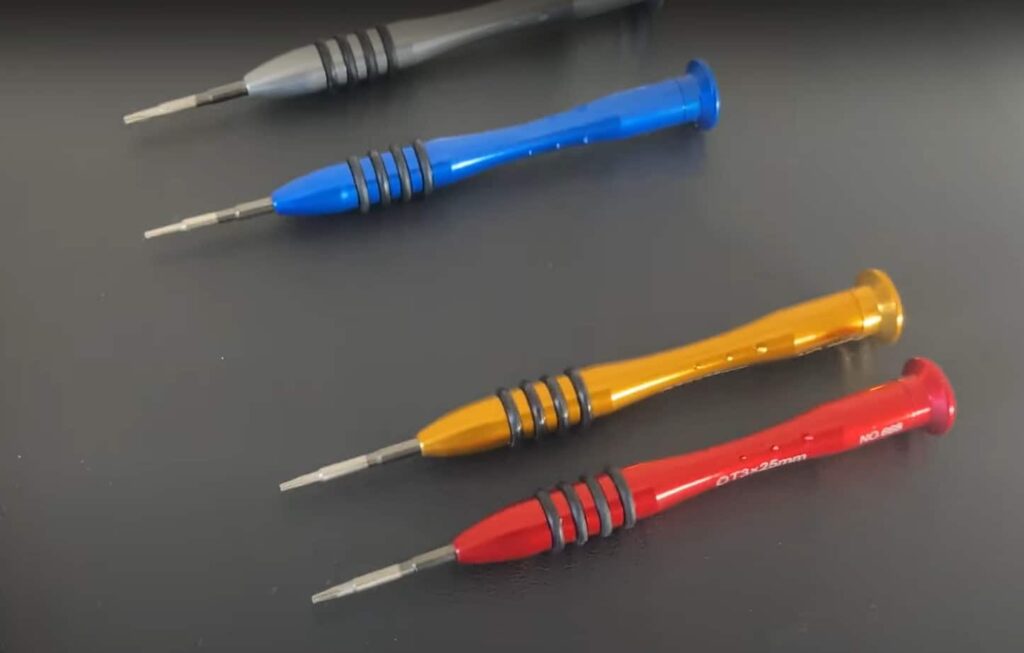
The first thing you should do is get the tools ready. To remove the hard drive from the MacBook Pro, you will need a Pentalobe screwdriver or a Philips #000 screwdriver.
If you have a MacBook 13, MacBook Air 11, 13, and the early models of MacBook Pro 13, 15, or 17, you will need Tri-Wing Y0 Screwdrivers.
You will also need a Torx T5/T6 screwdriver to remove the hard drive from your Macbook Pro.
A pry tool and a plastic clip to remove the back cover, and if you don’t have a plastic clip, you can try using a credit card as well.
Step 2: Remove Screws
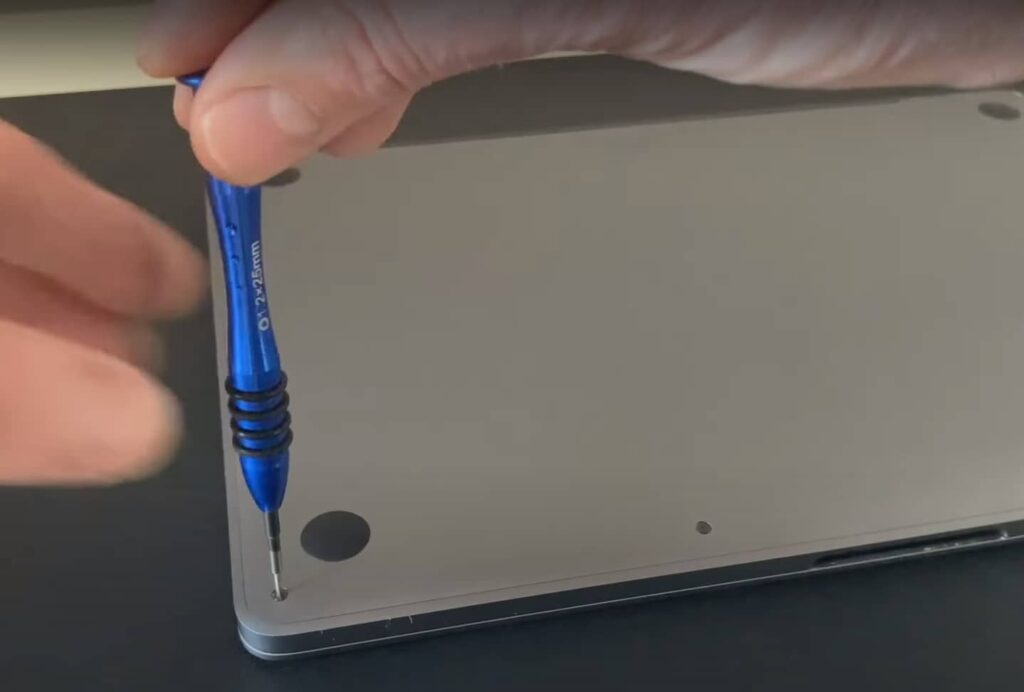
Now that we have all the necessary tools, we can begin with the procedure of removing the hard disk from your MacBook Pro.
First, we need to open the MacBook to get access to the hard drive, and to do so we need to remove the screws.
There will be a total of ten screws in the back cover, some of these screws are tiny, and some are long, so we advise you to keep a tray along with a magnet, to keep them all together. After you have removed them, you will be able to lift off the back cover of the MacBook Pro.
Here’s how you can do that:
- Turn off the MacBook then put it upside down, and unplug any power sources connected to it.
- Now time to unscrew. When you remove the screws, just place them next to the hole it was taken out from, so you don’t get confused while placing them back in. Or you can just place them all in a tray, to keep them from losing.
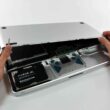
Step 3: Remove The Back Cover
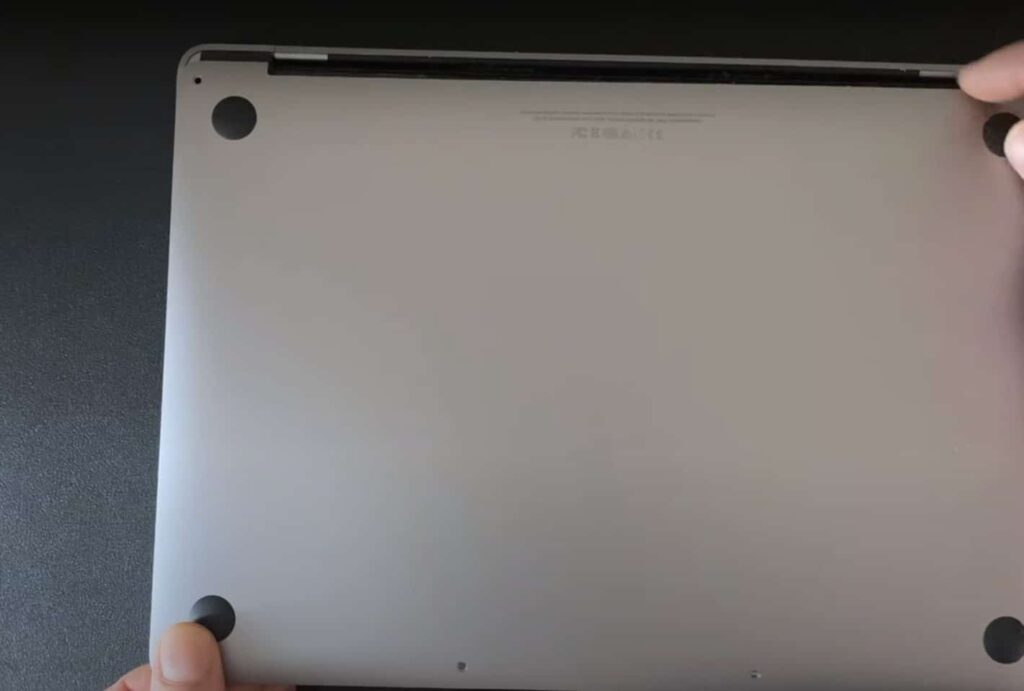
After you are done removing all the screws, you will be able to take the back cover off from your MacBook Pro, be careful while doing that and put it aside.
If you are struggling to lift the back cover off the MacBook Pro, then try using a pry tool and a plastic clip.
Here are the steps:
- Take the Pry tool and put it at the end of your MacBook Pro.
- Use the pry tool to lift off the back cover slightly so that you can slide a plastic clip underneath it.
- Now take the plastic clip or a credit card, and slide it around from one side to another side to detach it.
- As you slide the plastic clip, you will hear a loud pop sound, don’t be alarmed it’s normal when you open the back cover of any PC.
- Once you are done sliding the plastic clip underneath the back cover, you will be able to lift it off.
- Just grab one side of the back cover by using your hand and carefully try lifting off the cover.
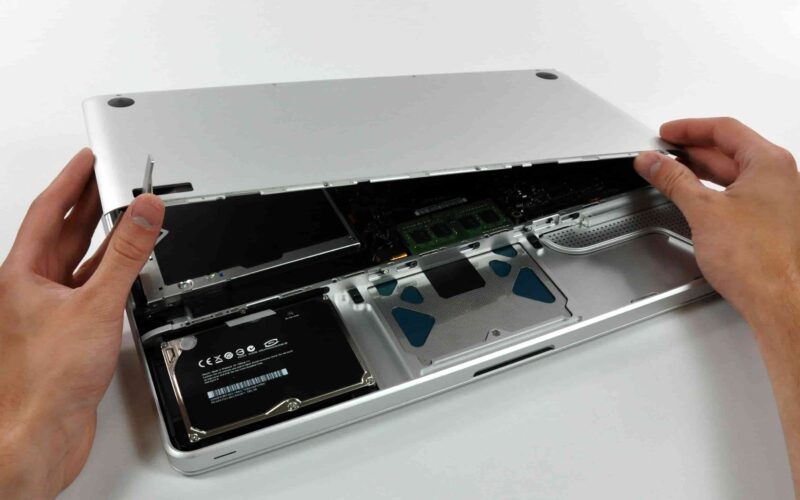
Step 4: Identify The Hard Drive
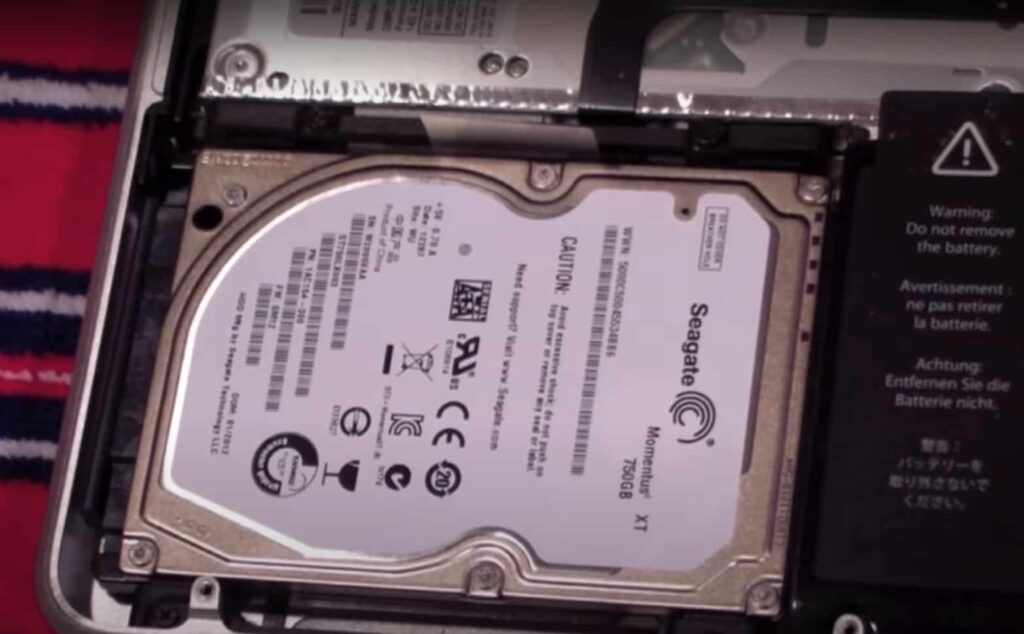
We have finally got the back cover off, now you will be able to see the inside of the MacBook Pro.
The next thing we need to do is locate the hard drive. In most MacBook models, you will be able to find the Hard drive in the bottom left corner.
The hard drive is rectangular in shape and silver in colour. It will be fixed in place by a black plastic bar or a bracket.
Step 5: Remove The Black Bar That’s Holding The Hard Drive
You will see a black bar or bracket on top of the hard drive holding it in place. To remove the hard drive, you first need to remove the black bar that’s holding it.
Look closely, you will see two black screws in the black bar. Use a Philips #000 screwdriver to unscrew them and take the black bar off of the hard drive.
Make sure to not unscrew the silver screws as they are screwed inside the hard drive. After you have unscrewed the black screws, take the black bar off the hard drive and put it aside.
Keep the black bar as you will need it when you install a new hard drive.
Step 6: Get The Hard Drive Out Of The Body
After you have removed the black bar that was holding the hard drive, you can remove the hard drive from the MacBook Pro.
You will see a plastic tab coming out from behind the hard drive, just pull on it and you will be able to lift the hard drive out of place.
In some MacBook models, you may need to disconnect the optical drive cable, camera cable, and the cables that are attached to the Bluetooth bracket.
Step 7: Remove The Black Bar From The Hard Drive
There will be another black bar that will be attached to the side of the hard drive. You need to remove that black bar carefully.
You need to pull that black bar off the hard drive and keep it aside as it will be used when you install a new hard drive in the system.
Safety Consideration While Removing Hard Drive From MacBook
While handling electronic stuff, it’s better to take precautions just to avoid any mishap from happening.
Here are some safety considerations while removing the hard drive from a MacBook and be mindful of the following safety precautions:
- The first thing you should do before removing the hard drive is shut down your MacBook, and disconnect it from any power outlet.
- When you are handling the hard drive, use anti-static precaution tools such as a static wristband, anti-static mat, or gloves, to avoid getting static inside your body.
- Be careful when you are removing the hard drive as it can be easily damaged if not handled properly.
- Be careful of electrical connections connected to the hard drive, and make sure to not puncture them or break them while removing the hard drive.
- Store the hard drive in a safe and secure place. Do not dispose of the hard drive carelessly.
Conclusion
Removing the hard drive is not that difficult once you get all steps right. Just be sure that once you have opened your MacBook, it will be void of any Apple warranty. So, only proceed with the removal process when you are confident enough that you will be able to remove the hard drive without any professional assistance.
Just remember to keep a few things in mind while you are removing the hard drive from your MacBook Pro. Make sure that you have all the necessary needs you need to get things done, tools like- you will need a Pentalobe screwdriver or a Philips #000 screwdriver and for different models like MacBook 13, MacBook Air 11 13, and the early models of MacBook Pro 13, 15, or 17, you will need Tri-Wing Y0 Screwdrivers.
A Torx T5/T6 screwdriver to remove the hard drive from your Macbook Pro. You will also need a pry tool and a plastic clip or a credit card, to pry open the back cover of the MacBook.
Follow along the steps as directed and you will be able to take the hard drive out of your MacBook Pro. You can replace the old hard drive with a new one, just repeat the same process you followed to remove the hard drive.
Also, be sure to follow the safety precautions like wearing anti-static gloves, static wristband to avoid getting static inide your body while you are handling the hard drive.
After you have removed the old hard drive and replaced it with new one, just keep the old hard drive in a safe and secure place. Do not throw it carelessly.